I built my own workbench
I can’t believe I built my own workbench! 🔨🔩😀
In the past few years whenever I need to work on things I had to do it on my garage floor, this is very hard for my back. I decided that I need to get a workbench.
Why build myself
When I started researching workbench on the Internet I was quickly exposed to tutorials and videos on how to build your own workbench. It is fascinating to me. To me, the key benefit of custom built workbench is you can tailor the height of the bench to suit your body height. (The same applies when you can custom build your kitchen bench)
Here’s a good video from EZ Woodshop on how to decide the right height of your workbench and why it’s an important thing.
Design
After looking at various workbench designs on the Internet (for beginners), I think I needed two things for my workbench:
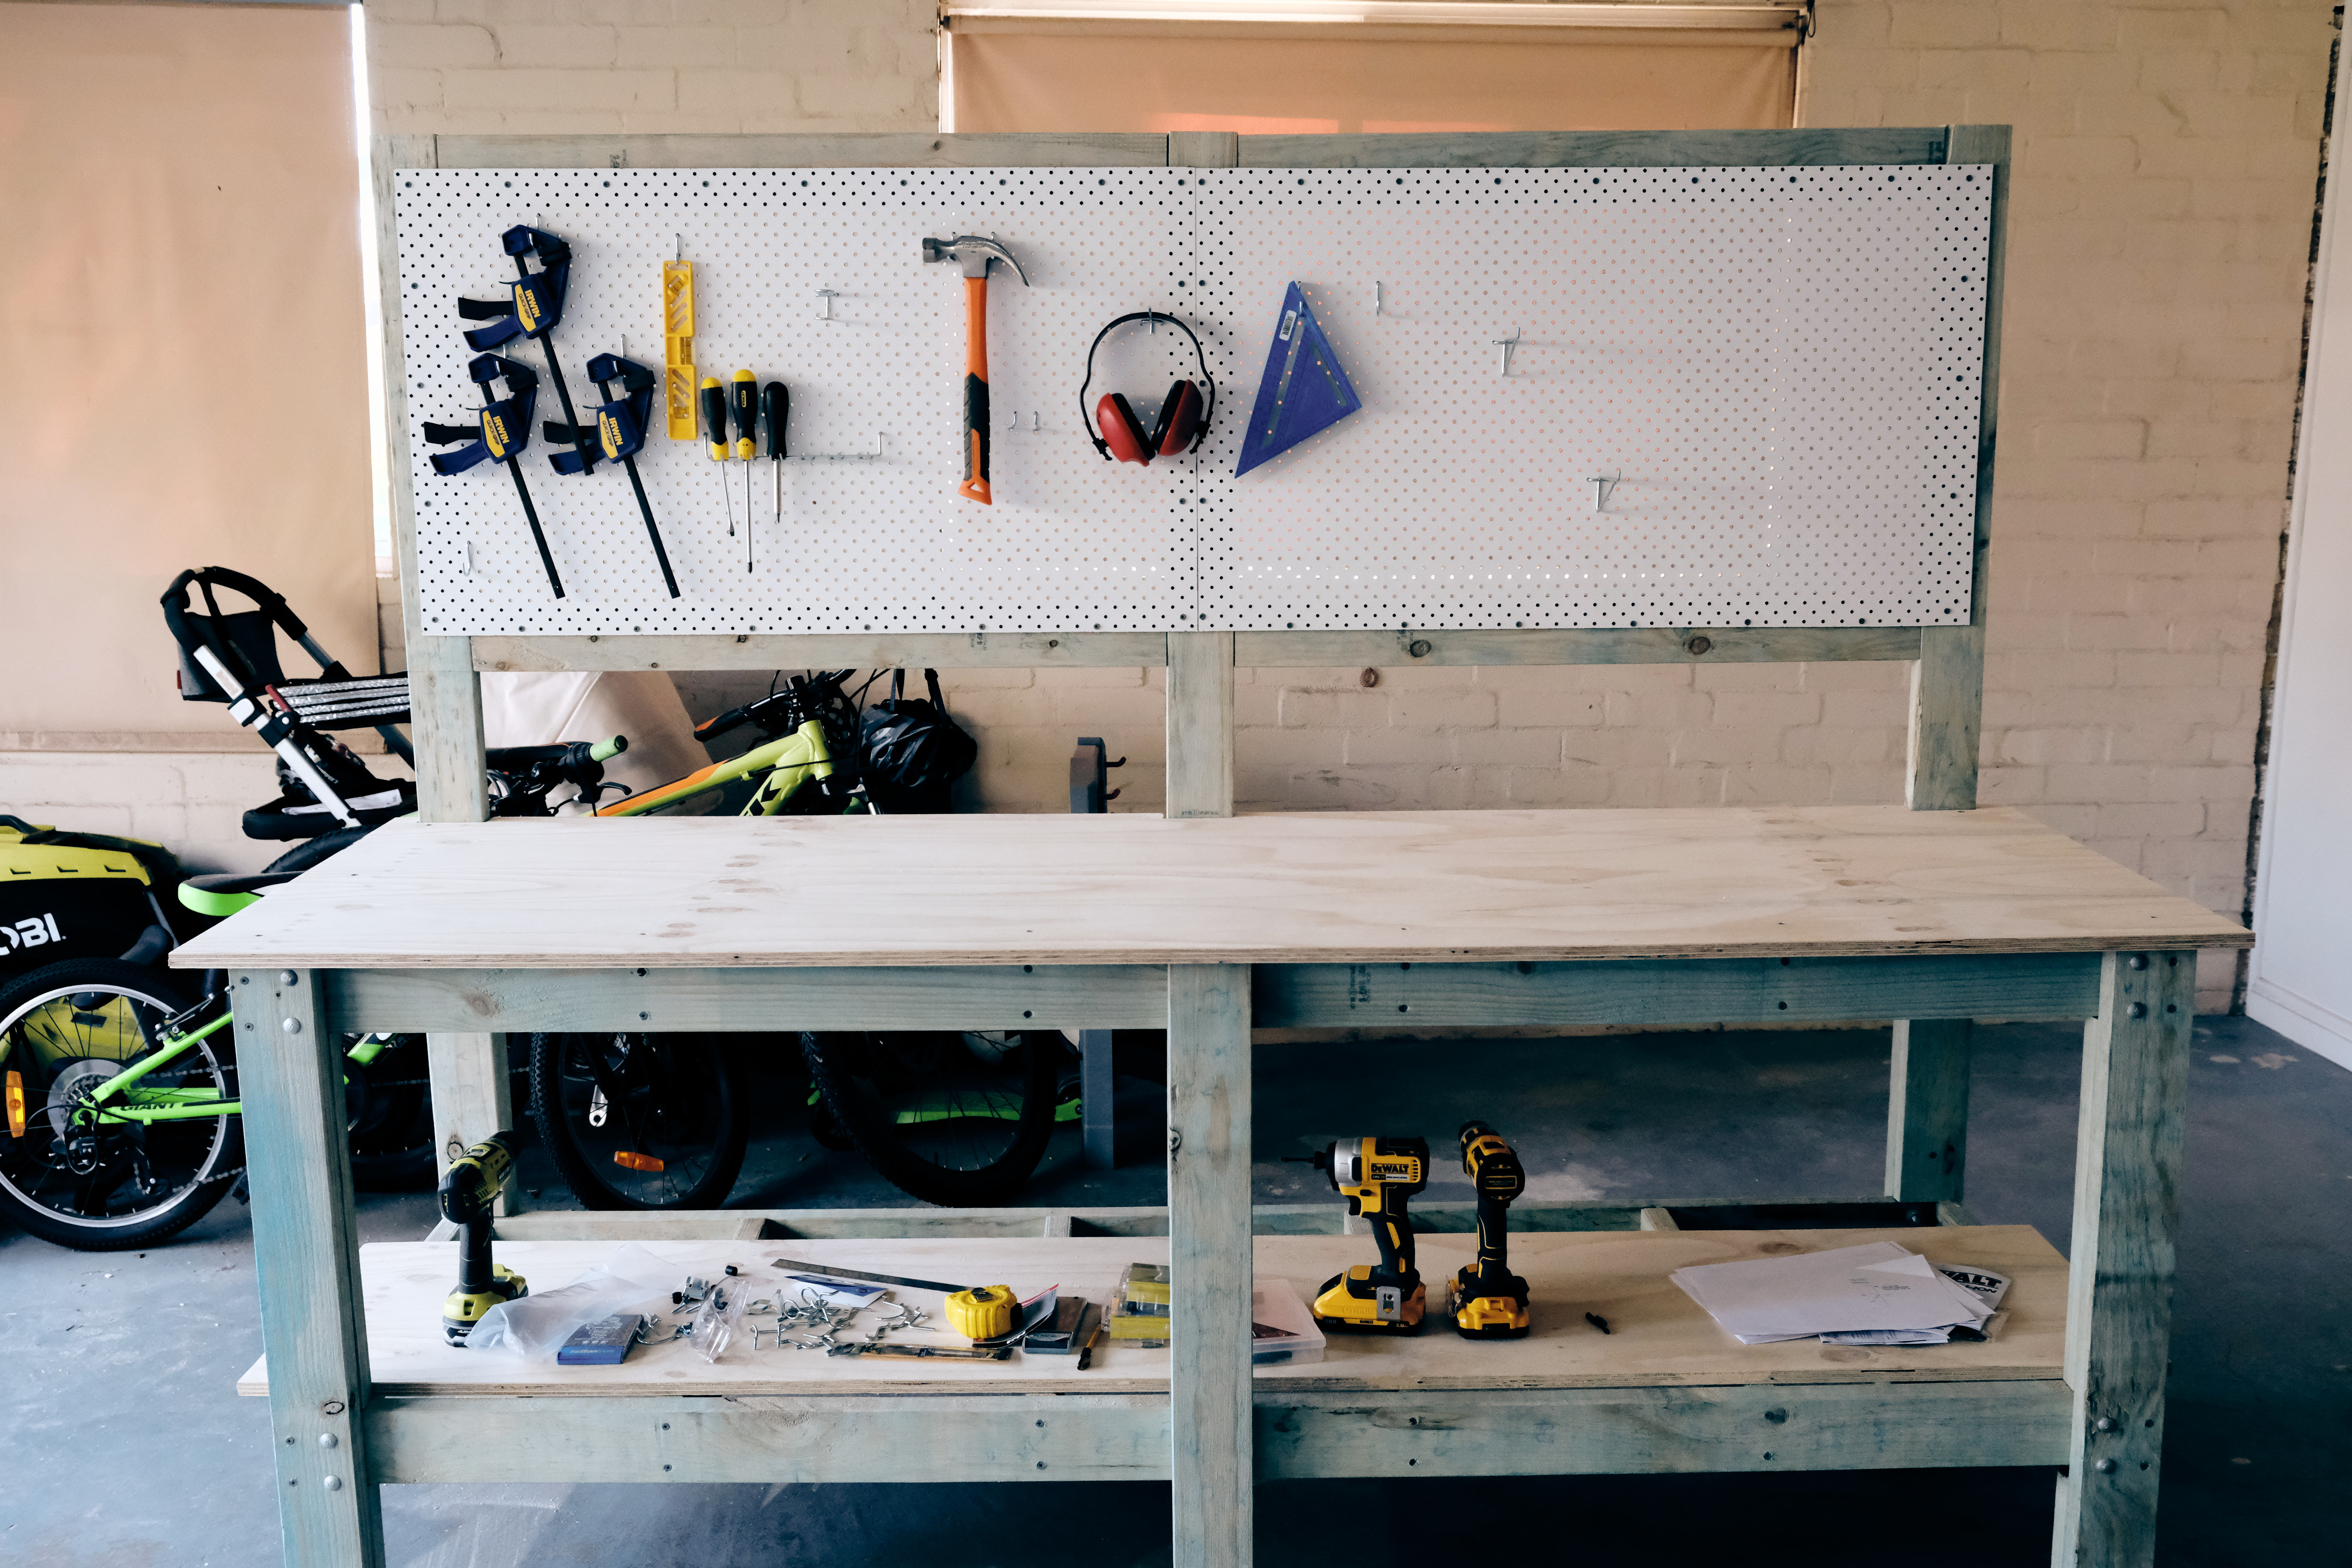
- A pegboard raised on the far side of the bench
- Overhang from bench top for clamping
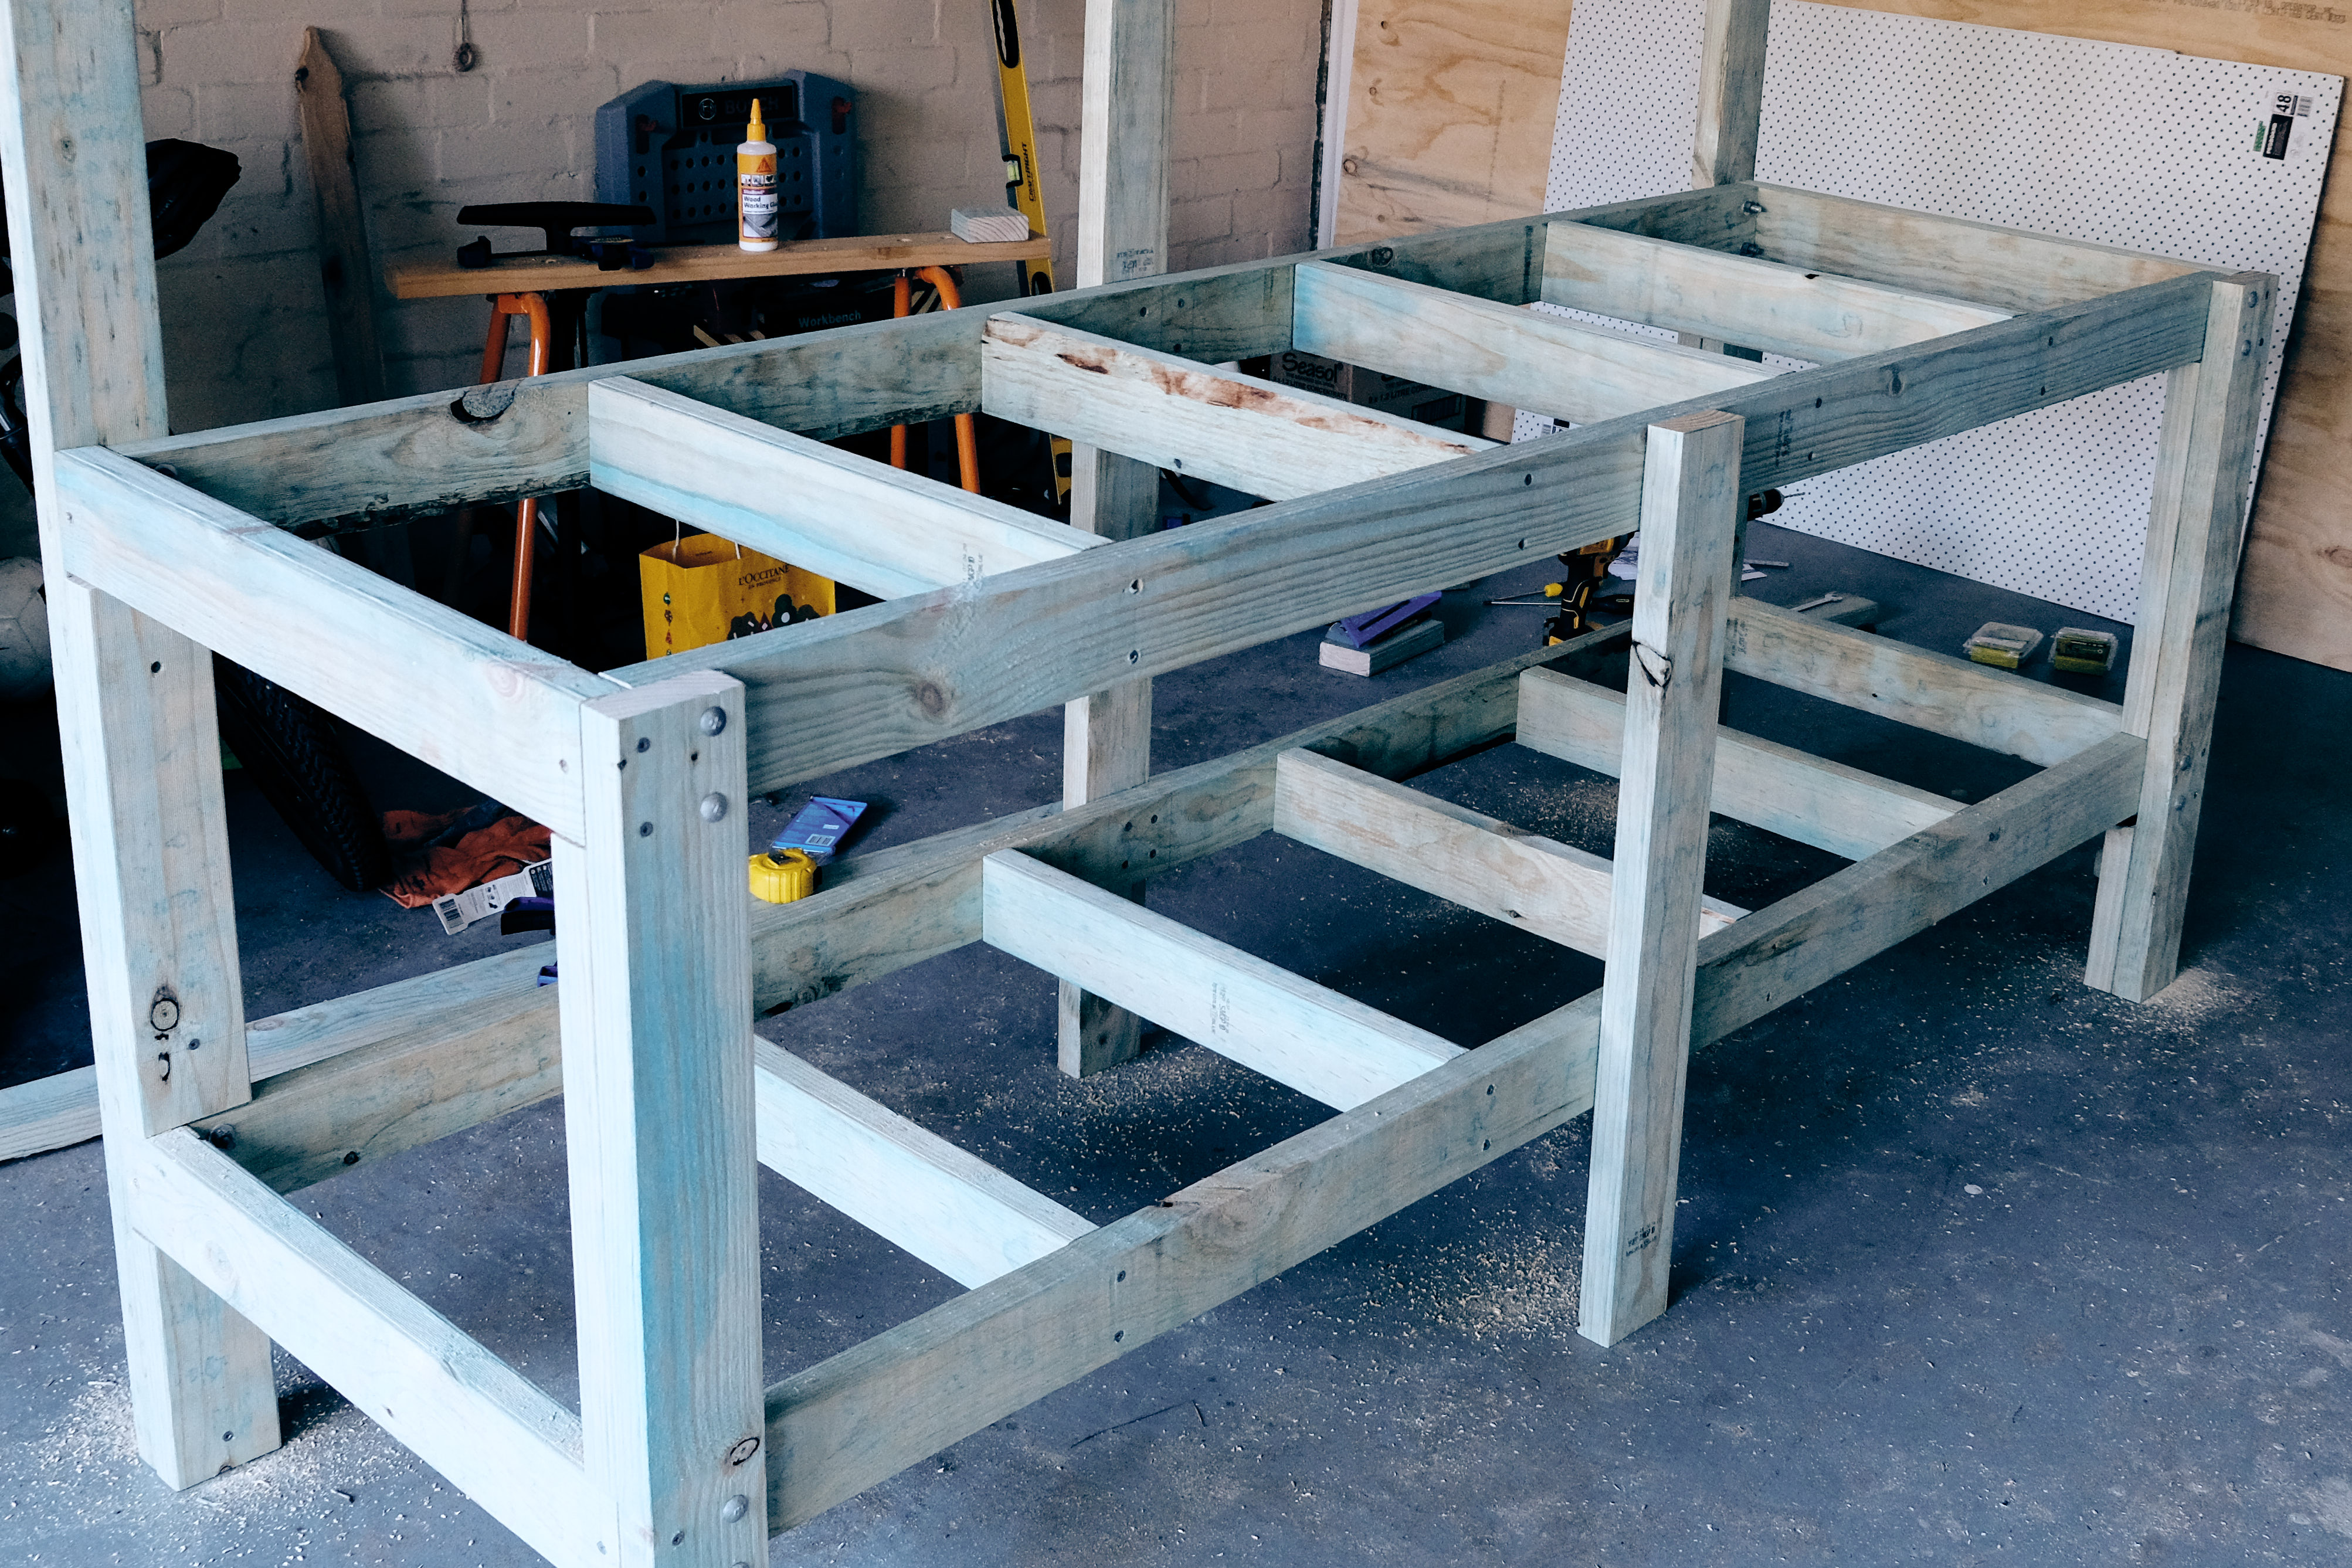
In terms of structure I used /90 x 35mm treated pine/ to create the main frame of the workbench (closest to the 2x4 lumber used in US based designs). In order to make the structure strong I incorporated following 3 elements (from various design I saw):
- More centre rails, 4 instead of 1
- Two additional legs in the middle
- Using 10mm nuts and bolts to join legs and frames
Here’re the three designs that I got most my inspirations from, highly recommended:
- Build a Simple 2x4 Workbench - YouTube
- How to Build a Workbench. Easy, Cheap & Sturdy - YouTube
- My First Project (Book) - YouTube
The Build
It took me 10 days to finish the build, as shown in the beginning of this article. Given I can only work at nights and weekends, now I feel it’s pretty impressive. I remember when I was building it it almost felt like it’s going to take forever.
Things I learned
Having the right tools and applying the right techniques can save you a lot of time. I bought a good quality hand drill and an impact driver, watched some good drilling tips videos before I started. Those money and time are well spent.
Timber posts are not straight. You can’t measure and cut everything first and expect they will fit precisely as your design. Build, measure, cut as you go.
Material & Cost
- 35×90mm H2 Treated Pine MGP10, 3.6M X 9 - $129.35
- 2400×1200×17 CD Plywood Structural - $71.6
- Pegboard 1220×910×4.8mm, X 2 - $58
- M8×90mm Zenith Galvanised bolts & nuts & washers X 16 - $16.96
- Zenith 75mm Zinc Plated Mending Plates, 12 Pack - $6.82
- 10×65mm treated pine screw 50, X 2 - $14.4
- 10×40mm treated pine screw 100, $9.2
- PVA Wood Glue, 250ml - $ 12.38
Total: ~ $320
What next
I’d like to finish the bottom shelf properly. At the moment I only used the left over plywood to cover half of the bottom level. Also I’d like to put some oil finish on the bench top.